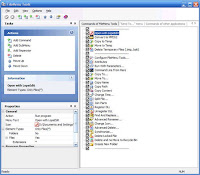
FileMenu Tools is freeware.
Supported Operating Systems: Windows 98/Me/2000/XP/Vista.
Microsoft Windows tips and tricks, Registry tweaks, Computer software and Software problem...

 ad accelerator and managerOrbit is a download accelerator and manager based on P2P techonology. And it has advanced robust multithread download algorithm implemented with high quality.Orbit integrates seamlessly into Microsoft Internet Explorer to automatically handle your downloads. Using Orbit you can easily download files from any remote server via HTTP, FTP, RTSP, MMS. With Orbit the downloading process will be as easy as nerver before. Orbit is a light-weight, powerful and easy-to-use application. Also it is well-known for its intuitive and user-friendly interface.Orbit is an indispensable tool for download acceleration. It has a smart download logic accelerator that features intelligent dynamic file segmentation and safe P2P downloading techonology to accelerate your downloads. Orbit can resume broken downloads. So you needn't start the downloading process from the very beginning
This is one of those tools that you must download and keep somewhere on your hard drive. You may not use it that often, but when you do need it you will be very thankful that it’s there. It is able to reveal any hidden window, including programs that seem to disappear completely after explorer crashes and are not amenable to being brought back using Windows’ Task Manager.
Imagine the following scenario: you are working on something for more than an hour using program A when Program B crashes, or Windows explorer itself crashes, or for whatever reason the system crashes. Your first reaction is to go to the task manager, find the program or process that is causing the trouble and end it (or in the case of explorer crashing, you end the explorer.exe process, go to the task manager’s ’file’ menu, and run a new instance of explorer).
All good and well, except now the window for Program A is not showing. A quick check with the task manager shows that the process for Program A is indeed running, but you have no access to it. Or it’s showing as an application in the task manager but you are unable to reveal it even when you right-click "switch to" or "bring to front". At this point you are prepared to bite the bullet; you’ve already started thinking about not wasting any more time and simply re-creating any unsaved work. But here’s the good news: Unhider will most likely bring the application window back for you, enabling you to save your work before you restart your computer.
I’ve had this program on my machine for about two weeks, during which time it successfully enabled me to get my applications back from the brink (and saved my skin) three different times. There are other uses for it; here are a few that are listed on the program’s home page:
The verdict: Unhider is a no-install app that you simply unzip on your hard drive. Download it and keep it in mind: I guarantee that the time with come when you will be very grateful for it.
Version Tested: 1.0.0.1
Compatibility: Windows 9x/2000/XP/Vista.
(Download)

Windows XP Chkdsk - How To Using The Command Line...
When Windows XP encounters a problem and has to shut down, perhaps there is a power cut, a motherboard problem etc..
The operating system will "flag" the volume as "dirty" and attempt to check it on reboot.
run the chkdsk command to check for problems.
To do this:
Step One: Click Start, select Run
Step Two: In the box, type cmd
Step Three: Click Ok
Step Four: Run the chkdsk utility by typing in the following command:
chkdsk c:
..or
chkdsk c: /f /r
NOTE: The /f command automatically fixes any errors encountered, the /r command locates bad sectors and recovers readable information.
NOTE: I am also assuming the drive you wish to check is the C: drive.
Step Five: A reboot is normally required for the chkdsk program to lock the disk and run correctly (this is typical on machines that have only one volume), so simply restart the computer and chkdsk will run automatically. When it's finished, (This process can take quite a while depending on the size of your disk, etc.), it will boot back to normal Windows.
On Rebooting the PC you will see the disk being checked as in the screenshot below:
This process can take up to an hour!